

Today we talk about the dreaded issue of Caravan damp! It’s something we caravanners all fear, so I thought it would be a good time to cover some of the best ways to spot and deal with damp in a caravan along with some practical tips on how to prevent it in the first place.
Damp can easily wreak extensive (and expensive) damage. Therefore, it’s critical to understand how to identify, stop, and cure moisture before it’s too late.
Why Do Caravans and Motorhomes Get Damp?
This is the most common question! Damp occurs when moisture and condensation are present in the air within the van due to poor ventilation, or ingress has occurred due to failed silicone sealants.
The UK sees a high number of caravans and motorhomes with damp due to its rainy climate.
Even something as simple as cooking, or showering will cause lots of moisture to accumulate within your caravan!
Because they are such small spaces to live in, caravans and motorhomes make an ideal environment for moisture to thrive.
It’s also true to say that older vans are much more prone to damp issues due to the older, outdated materials used and deterioration over time – so it’s really important to consider when you are buying second-hand.
A good indicator of a previous damp issue on an older caravan will be signs of replaced panels or new wallpaper.
Dispelling Some Common Damp Myths!
“You can tell you’ve got damp by its musty smell” – Nope! You CANT always smell damp – this is why you need a damp meter.
“The body of my caravan doesn’t have wood so it can’t get damp” – WRONG! The floors in caravans and motorhomes are still made using wood, or composite that still has wood materials. This can still get damp.
“You can tell you’ve got damp because you can see it” – Not always!
As we’ve covered here, damp and rot can occur almost anywhere in your caravan or motorhome and it’s often found in less obvious places.
If you get to a stage where you can see damp – you probably need to get some repair work done.
Checking For Damp in Your Caravan or Motorhome
It’s always worth making damp checking part of your maintenance or cleaning routine and should be done along with the seasons.
Here’s What to do When Inspecting Your Caravan:
- Get a dry tea towel and wipe and ‘dab’ around the window seals, door, frames, wall and ceiling – paying attention to any sealants. If your towel feels damp to the touch, it’s time to inspect further.
- Using your hands – gently press into the walls above and under the windows, around the toilet and doors – does it feel firm or a bit ‘spongy’?
- Sometimes you can see ‘dimpling’ on the wallpaper which can indicate a damp issue.
- Walk up and down the van – are there noticeable ‘creaking’ noises? Is there any softness under foot?
- Externally, get up the side of the van and inspect the sealant. Are there any cracks, breaks or signs of perishing? If so, this will need repairing as soon as possible. You can do this yourself if you’re up to the job, or an approved caravan technician should be able to do this for you reasonably cheaply.
- If you’ve had a rack installed on the back of the caravan or motorhome – check around the screw holes for signs of water ingress.
- Visibly look around for signs of mould on the ceiling and around the windows – this is not always a sign of damp and could just be a simple ventilation issue. Either way, it’ll need to be removed pronto!
- Check your cushions, couches and upholstery as well as behind the curtains for any dampness.
- Look at the visible screws in the caravan – are there any signs of rust?
Because caravans and motorhomes have ‘channels’ along the roof, water can travel along and find its way to a random part of the van making it difficult to find the source of ingress so be sure to check under the bed, couches, cupboards and bathroom thoroughly.


All About Damp Meters
As a caravan owner, a damp meter will be your best friend! If you don’t have one I strongly suggest you invest in one and use it at least once a month. Your caravan technician should also perform a damp check as part of your annual service.
Getting into the habit of regularly checking for damp means you can spot potential damp issues early thus minimising any repair costs.
If you tow with your caravan it’s worth knowing that seals can become broken or weakened with the stress of movement, and if given the chance water WILL seep into the caravan and cause damp over time.
It’s a sad fact (given what we pay for caravans and motorhomes) that ingress is as common as it is and can cause so much destruction to your pride and joy.
It really makes me mad that the manufacturers haven’t yet found a solution to this but that’s for another post!
It’s not necessarily the cost of materials needed to do the damp repair – but the labour, so buy a damp meter and do your checks!
If you are looking for a second-hand van, take an experienced person, preferably a caravan professional with you to properly check it over to avoid any heartache further down the line.
When buying a damp meter – be aware that the cheaper models are not likely to be suitable for your caravan and will more than likely pick up ‘outside’ dampness, rather than structural dampness. Try to go for a ‘professional’ damp meter if your budget allows for it. If not try to do your testing on a dry day to avoid reading errors.
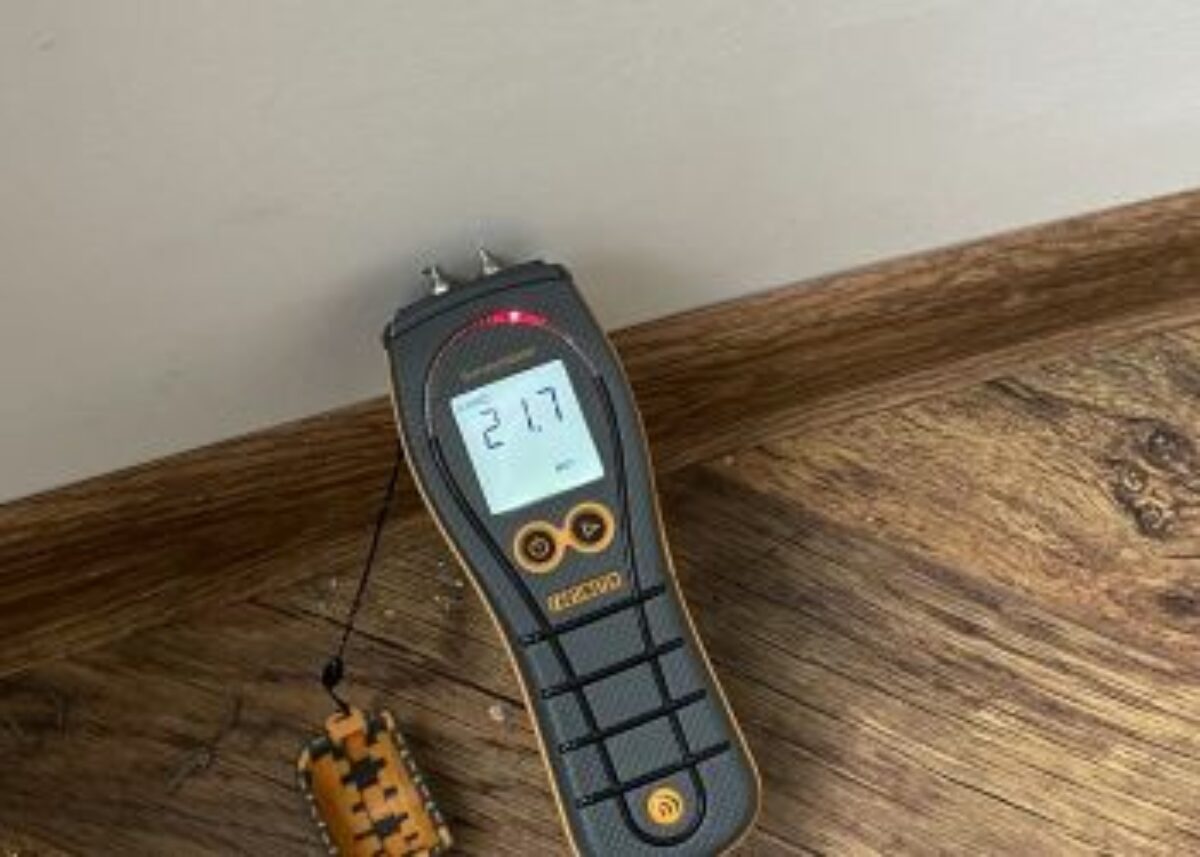
This is the damp meter we are currently using and it’s been excellent:
Protimeter Mini General Purpose Moisture Meter

- Easy to use, precision moisture meter with built-in pin probes, designed for general purpose moisture measuring
- Clear and simple colour-coded LED display
- Display shows moisture content and classification, dry (green), borderline (yellow), or damp (red)
- Includes calibration device for checking correct functionality of instrument
- Supplied with extension pin probe, allowing use in awkward positions
How to Use a Damp Meter
So we’ve covered the importance of buying a damp meter – so how do you actually use one?
They are really easy to use and look a little bit like a walkie-talkie. They will either have two pins at the top but you can also buy ‘pinless’ ones which aren’t as reliable – but don’t put nasty holes in your caravan walls!
All you need to do is switch it on according to its settings and press in slightly or against (depending on which meter you go for) to the area you want to check. It will then give you a reading – usually as a percentage.
Where to Check:
Anywhere you think there might be moisture, use a damp tester – be careful to test the following areas:
- Test behind the window rubbers by peeling them back
- under and around the seats and lockers.
- Inside the cabinets.
- All of the entry points (windows, doors, and any seams, including where the roof joins the ceiling).
- Anywhere you have installed external items such as bike racks
The video below also shows some good tips on how to use a damp meter – its in a motorhome, but the process is the same:

What is an Acceptable Level of Damp?
0 – 15%- Indicates a Dry Caravan, With no Damp.
If a surface is between 0-15%, it means the surface is dry and all is well
20 – 25%- A Potential Damp Problem. Consider calling a Professional or Investigating Further.
If you’re noticing an increasing problem with moisture levels inside the caravan during non-use periods (like when it’s in storage), then investigate further.
It could be indicative of an underlying issue like faulty sealant or water damage.
25 – 30%- You Very Likely Have a Water Ingress Problem – Remedial Work May be Required.
Water ingress can often go unnoticed until it has caused major damage.
As such, always consult a professional before taking any action – just to be sure that everything is done correctly and without causing further damage.
You Might Be Interested In:
Leaking Caravan? How To Seal It Properly
How To Get Rid Of Condensation In Caravan Windows
The Best Caravan Awnings For The 2022 Season
What About Humidity Readers?
Humidity readers will calculate the level of moisture within the caravan or motorhome by detecting how much water is in the air.
If you have a humidity reader and it’s showing levels at 50% or above you should definitely investigate further.
A humidity reader cannot tell you where the damp is coming from but can give you an early indication that it is present.
Again, the weather can make a difference to these readings – as well as cooking or showering, so try to do your reading at a more suitable time.
Getting Rid of Mould and Mildew
We know how worrying the issue of damp can be, but it can be remedied if you catch it early enough with a simple cleaning of mould and mildew.
Mould can make some people feel really unwell and it’s important to thoroughly remove it to prevent further spread. Try to wear a mask to avoid inhalation of any spores and wear gloves where possible.

Mould and mildew can seriously harm your health in addition to being unsightly and destroying your indoor living area. particularly in young people, the elderly, and just much anyone who has a pre-existing medical problem.
A few of the health issues are:
- Reactions due to mould spore allergies.
- Issues with breathing and asthma.
- Higher risk of infection in immunocompromised individuals.
- Memory loss, weariness, mood swings, and even migraines.
- Rashes, eczema, hives, and other skin conditions.
So you can see how important it is to rid your caravan or motorhome of nasty mould!
How to Clean Mould and Mildew:
Firstly, DO NOT use bleach as this can cause damage to woodwork and wall coverings!
- Grab a bucket and fill it with warm water and washing up liquid. You can even use white wine vinegar as an excellent natural alternative. You can also buy mould removal spray, but I personally don’t like the harsh smell.
- Using a clean cloth, soak and wring out excess water in the bucket then gently rub the areas where there is any mould. More stubborn areas can be gently scrubbed using a toothbrush.
- Wipe off excess water and lightly dry, then fill a spray bottle with a tablespoon of Clove oil, or Peppermint Oil.
- Leave it on the surfaces for around 30 minutes then dry off with a clean tea towel. Clove and peppermint are excellent at destroying mould spores and will help stop them from returning and growing.
Bag up bedding and curtains and give them a good wash at high temperatures with a disinfecting laundry cleanser.
Once you have cleaned the whole caravan – finish by giving everywhere a good hoovering – including the mattresses and couches.
You Might Be Interested In:
How To Buy A Used Caravan: FREE Printable Checklist!
Finally, get all the windows and doors open to allow the caravan to fully air out.
Tips for Reducing Mould and Mildew in Your Caravan
Caravan/Motorhome cleaning and maintenance is key here – regularly doing so will alert you to any serious issues with your van and will help to keep mould and mildew at bay.
Below is our handy-dandy cleaning and maintenance checklist!
- Clean and hoover the interior of your caravan as often as you can, and wipe down surfaces, doors and cupboards with a disinfectant spray. Make sure everything is dried off afterwards.
- Give your caravan a good airing out by opening up the roof lights, windows and doors. If it’s in storage for a long period – try and get up to check on it and do the same thing even if it’s just for half an hour.
- Move any soft furnishings away from the walls whilst the caravan is not in use
- Remember to do your damp checks – monthly if possible or at the least, quarterly
- When opening up the van after winter carry out steps 1 and 2 again
- Check around for any signs of water ingress near the windows, toilet and wall and ceiling
- Use a dehumidifier any time the caravan or motorhome to keep moisture under control
- Get your caravan and roof joints resealed every 3 – 5 years
- Try not to use a jet washer to clean your van – the power can cause sealants to perish leading to ingress. If you do use one, make sure you know what you are doing!
- Get any cracks to the bodywork or panels repaired as soon as possible
Tips for Reducing Condensation in Your Caravan or Motorhome
No matter how well you take care of your caravan, there’s always a risk of moisture, mould and dampness – so prevention or minimisation is the key to reducing moisture build-up.
Keeping your caravan well-ventilated should be the first thing – keep windows and roof lights open where possible during the day and on night lock during the evening will keep air flowing around the van whilst it’s in use.
When cooking – make sure the window near the cooker is open and the ceiling fan is on if you have one.
Don’t block the floor vents – keep them open all year round to encourage natural airflow.
Consider a dehumidifier – this can be a contentious issue among the caravan community, but they are excellent in soaking up excess moisture whilst you are using your van. They can also help dry out minor damp patches in the walls.
This is the one we use:
Pro Breeze Dehumidifier 500ml

- Perfect for removing damp, mould and moisture
- Capable of removing up to 250ml of moisture per day
- Ultra-quiet & efficient
- Auto shut off
Make sure the ceiling vent and window are open when showering and dry the whole space off when finished.
Don’t leave any wet clothes in the caravan – if you have an awning you can dry them out there, hang them outside to dry, or bag them up and put them in your car.
Don’t forget to dry off your pets and yourself if you’ve been out in the rain!
How to Tackle Ingress and Leaks
Caravan damp can be a real pain, and unless treated can quickly turn into a major problem. Keeping the caravan spick and span is not going to help much if you have a serious ingress issue as mould will keep coming back.
Ingress comes from the outside of the caravan or motorhome and will find its way through any channel, crack or weak point.

The majority of the time this is an easy fix when caught early enough by replacing the silicone sealant.
We have another post here that covers this more thoroughly.
If it’s not so obvious where the leak is coming from, then you should call in a professional for advice.
Will my Insurance Pick up the Bill to Repair Damp?
Most insurance companies won’t automatically cover costs for damp repair work – you’ll most likely need to take out a separate ingress policy.
If you buy a new caravan – you will be covered by the manufacturer’s warranty. Good dealers will also offer a short warranty on used caravans.
We are currently working on an article covering caravan insurance, so be sure to come back soon to check it out.
Reducing Potential Damp Issues During Winter Storage
Damp loves to thrive during the rainy and dark months, especially when it’s unheated and not being aired out, so if you keep your caravan in storage it’s advisable to visit as often as you possibly can.
- Each time you visit open up the windows while you are there to give the caravan a quick airing out.
- Before you store the caravan away – make sure it’s given a good cleaning using all the steps we mentioned above.
- This is also a good time to check on the external seals and repair them if needed. Keep an eye out for any cracks and leaks also.
- Take out bedding and clothing items to bring home.
- Move the sofa back away from the walls and bring them home if you can, or store them centrally in the middle of the floor.
- Leaving the blinds slightly up will allow some sunlight to come through and help to prevent mould from forming. We like to leave the roof light blinds half-open also.
Cover or No Cover?
Well, this is another contentious issue! This is completely up to you, but any cover you use should be breathable and waterproof.
FAQs
What Percentage of Damp is OK in A Caravan
Anywhere between 10-15% is the ideal range for your caravan – anything more may need checking out
What is the Best Damp Meter to Use?
There are many to choose from – the one we use and recommend is the Protimeter Mini General Purpose Moisture Meter
How Do You Stop a Caravan or Motorhome from Getting Damp in The Winter?
Move your cushions and couch backs away from the walls, and take your bedding home. Visit the caravan in storage as often as you can and carry the checks we have mentioned further up the article.
How Much Does It Cost To Repair Damp?
At the time of writing labour costs will be around £80 per hour. This doesn’t include materials – which due to the recent pandemic has caused material prices to soar. For a major damp repair job, you can expect to be paying around £1000-£2000.
Will Caravan Damp Dry Out on Its Own?
The good news is yes! But this depends on how serious the damp was and how far it spread. Once the repair work has been carried out – you can help things along by using a dehumidifier to draw out the remaining moisture and a heater to dry out the wood. We have a more in-depth post here about this
So this has been a lengthy post – thanks for sticking with us till the end!
We know damp is the No.1 worry for Caravan owners and we’ve experienced it personally, so I hope there have been some practical tips here for you to use. Just remember, if in any doubt – get a professional out and you will have many more years of happy times in your wobble box!
Till next time, take care, and happy Caravanning 🙂